My super advanced mapmaking technique – a handful of dice makes the map nice
interesting method
My question is do the die affect topography any or just set the borders?
I imagine it’s up to the person making the map. But maybe the more dice in a single spot, the more mountainous or forested the area. Maybe choose a few dice to be deemed cities, and some dice for ruins.
Maybe let the dice choose, like a nat 20 would be the world capital, and 10’s would be mountains or something like that.
1-5: Plains and fields
6-8: Forests
9-11: Mountains
12-14: Tundras and snow covered lands
15-17: Farms and towns
18-19: Larger cities
20: Capitals and castles
what would happing if all the dice landed on a 20?
then you have a very busy continent
not all of those are d20s though, so you’d have to come up with another method for the other ones
Adjusted for all dice you might have
D20
1-5: Plains and fields
6-8: Forests
9-11: Mountains
12-14: Tundras and snow covered lands
15-17: Farms and towns
18-19: Larger cities
20: Capitals and castles
D12
1-3: Plains and fields
4-6: Forests
7-8: Mountains
9-10: Tundras and snow covered lands
11: Farms and towns
12: Larger cities
D10
1-3: Plains and fields
4-6: Forests
7-8: Mountains
9: Tundras and snow covered lands
10: Farms and towns
D8
1-4: Plains and fields
5-6: Forests
7: Mountains
8: Tundras and snow covered lands
D6
1-3: Plains and fields
4: Forests
5-6: Mountains
D4
1-2: Plains and fields
3: Forests
4: Mountains
Holy shit. Definitely using this.
I swore at how simple this motherfucking thing is. You’re all bastards and i love you.
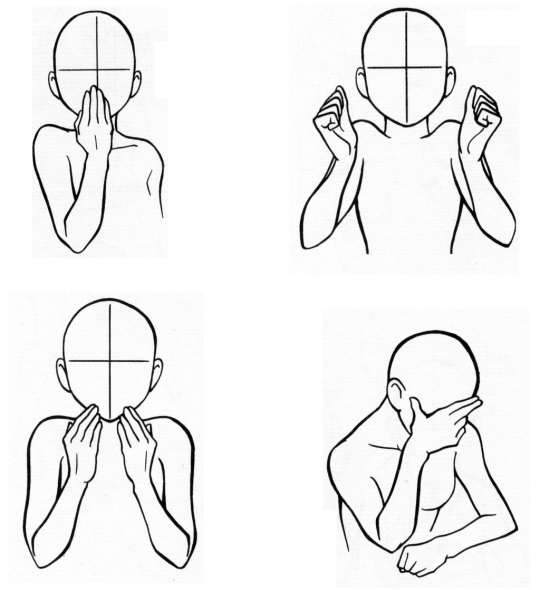
More How To Draw Manga – Vol. 4: Mastering Bishoujo Characters
this might be useful for me later
So, I’m looking at this (which is a very helpful guide) and I realize that pages 2 and 4 basically sum up what I think are my gestures most of the time
OKAY SO! @biazerod asked me a little help on storyboarding and i decided to make this tutorial…i’m not a professionist. so don’t take these as golden rules…just advices! and as always sorry for the english
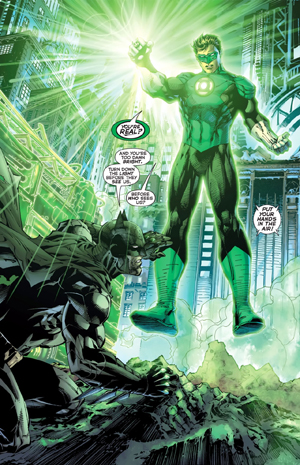
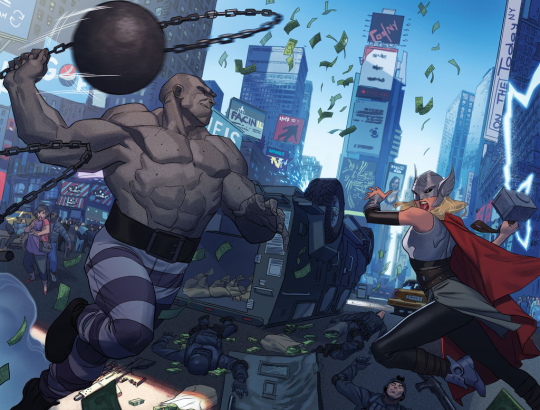
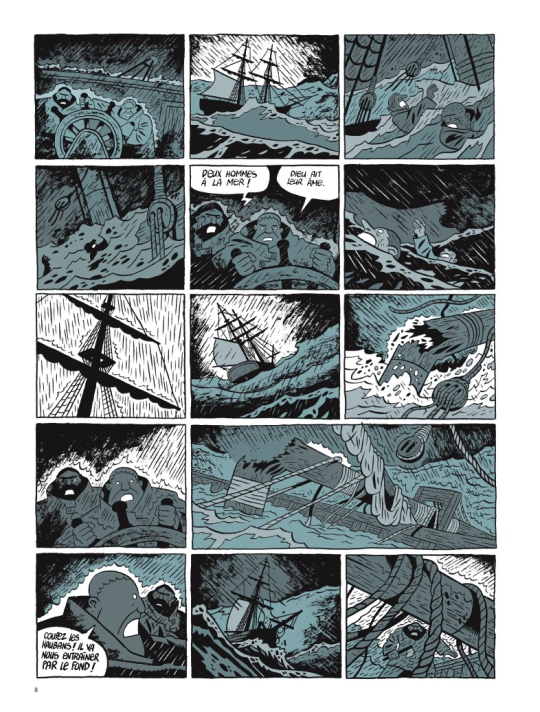
FIRST THING FIRST! the storyboard part is the most important phase in a comic page ! you can spend an entire day storyboarding! because it’s the structure, the essence of the page! here’s some tips : 1- a page can start from 1 panel/frame (called splash page!) until how many f*cking panels you can fit ! (some pages , especially in french comics/bd can reach 24 panels/frames!) Exaple of splash pages:
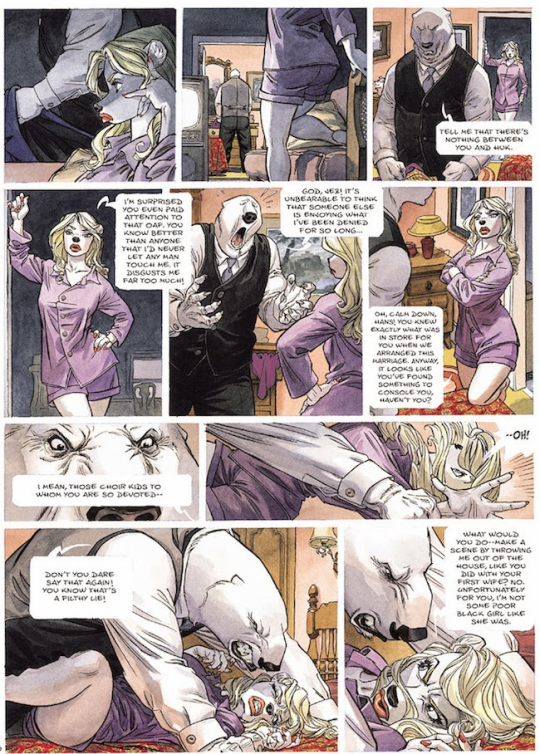
(these are from the green lantern,DC and the newest Thor ,marvel ) Splash pages are a priority of American comics, you rarely can find them in french Bd ! they represent a scene of impact! a fight! a revelation! be careful! use it only one if two times on a range of 50 pages! cuz it cut the narration! instead in french bd you find this :
first one is from Blacksad 2# and second one is from Atar Gull see how high the number of the frames is??
the number of frames is very important in a page because it decide the narration time! 😀 also it all depends on the kind of ‘’direction’’ you want to use on your comic! so be really careful when you decide the number of the frame! LET’S PASS ON THE CREATION!
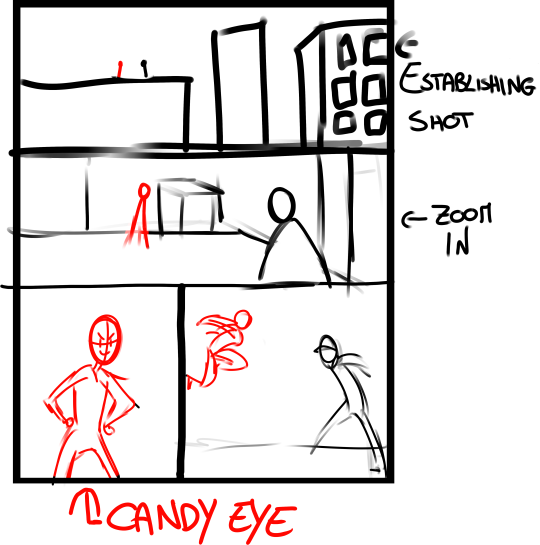
1- when you have a page that contains more than 3 Frames ALWAYS. ALWAYS HAVE AN ESTABLISHING SHOT!
the establishing shot is fundamental! BECAUSE READERS CAN UNDERSTAND WHERE THE CHARACTERS ARE!
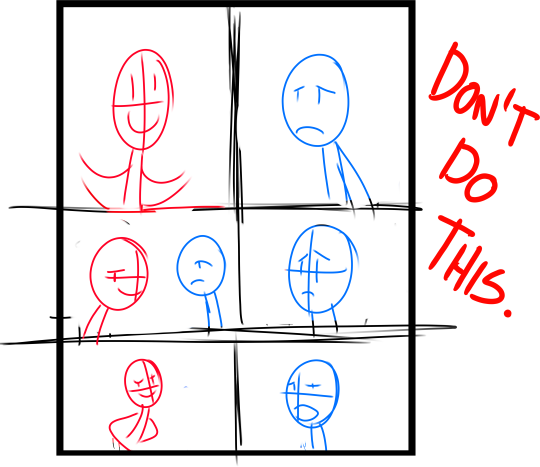
DON’T DO A COMIC PAGE FULL OF FACES !
DON’T DO THIS! LET THE CHARACTER BREATH! LET THE READER BREATH! PLAY WITH YOUR CAMERA! YOU HAVE THE POWER! in a comic page, is important to put the camera far away from the character most of the time! play with the different shots!
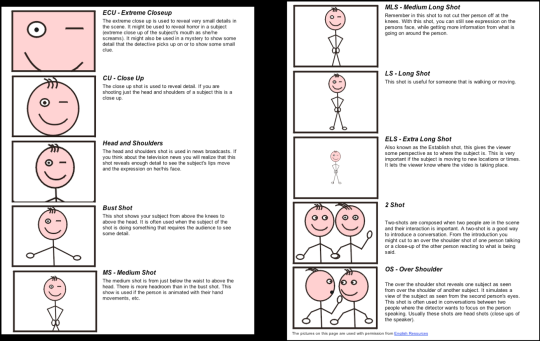
(found this on google) WATCH MOVIES AND TV SHOWS. lot of them can help you so much you have no idea! a comic artist and a director do the same job when creating a story
2- Candy eye this is a tricky trick that can help you with the audience! when a character is saying something important or you have to introduce them , USE THE CANDY EYE DUDE.
the candy eye is , basically, a bust shot where you show the character,their features , usually with a cool or a funny expression ( or of course it depends from the situation) and believe me WORKS 10/10 with the audience 😉
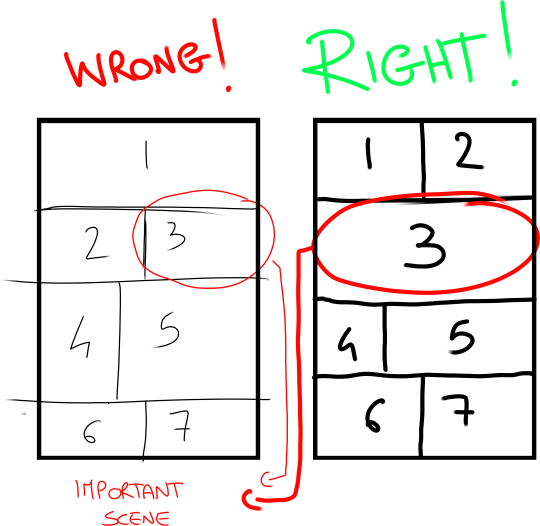
3- HIGHLIGHTS THE IMPORTANT SCENE IN THE PAGE!
FINAL TIPS: – when you’re doing dinamic poses try and try again! the first one isn’t always the best! -USE REFERENCES. –A STORYBOARD PAGE CAN REQUIRE EVEN 4 HRS IF NOT AN ENTIRE DAY IF NOT AN ENTIRE WEEK. REMEMBER THAT THE STORYBOARD IS THE ESSENCE. AND THE REST IS DECORATION. – IMAGINE THE SEQUENCE! NOT THE SINGLE PAGES. THINK IN SEQUENCES! imagine what would happen after the page you are creating! connect the various pages NOT THE SINGLES FRAMES ! YOU’RE CREATING A STORY! NOT A SINGLE ILLUSTRATION! -AGAIN DON’T DO PAGE OF FACES. most important thing:
if the page you’re creating it stresses you! STOP. continue it when you are in a better mood ,dude. our job requires lot of time and effort, but it should be the job we love. so don’t stress yourself and keep calm.
hope this is useful. don’t take this as golden rules, this is just the way i work 🙂
The program is called Sculptris and is a free off-shoot program from Zbrush, that program that you keep hearing about but either takes selling your kidneys or piracy to actually use.
If you download it and sculpt out a facial model, you can have references for your own work for all of time. No more endlessly searching Google for reference materials or twisting/rotating/flipping a drawing to see if there are flaws. And you can easily edit it to create more facial types. This way, you can make character references for any and every face and facial angle that you can think of.
The program offers mirroring right from the start, so your faces will be perfectly symmetrical. You can turn off the symmetry for things like scars or otherwise.
It takes a little time. For instance, I downloaded the program on Christmas and, in my spare time, this took a few days of getting familiar with the program (first day) and then sculpting for a few minutes each day, mostly due to my perfectionist nature. And this one isn’t even done. I still have to mold the mouth, ears, and other smaller aspects before I consider it done. However, I was so giddy over the possibilities that I wanted to share this with my fellow artists.
From now on, I have reference for a face in my own style and will be able to create things so much easier in the future.
I hope that this helps you guys and that you have fun with it.
I absolutely recommend Sculptris!
UH
GUYS????
This really useful oh my goodness. It takes a little figuring out, but once you get the hang of it it’s actually pretty easy. Just watch a couple youtube videos. Seeing how other people do it helps you to make sense of it.
OH BOY LOOK AT THIS HANDSOME SILLY do you know how hard his stupid face is to figure out at different angles? DO YOU??? Now I have a 3D ref!!! AAAHH!! so excite much 3d wow very angles wow
I’ve said this before and I’ll say it again: sculptris is an amazing 3D modeling tool for how small it is and is a great place to start whether you just want drawing references for your characters or you actually want to get into 3D modeling.