Let’s go beat someone up! But no seriously, does this prevent pain or something ? What do these bandages actually serve ?
It keeps your bones aligned to prevent injury, compresses soft tissue to make the fist more rigid, and pads the knuckles. Skull bones are sturdier than hand bones, and even if you know what you’re doing there’s a high risk of damaging your metacarpals if you punch someone barehanded. It’s why they recommend if you find yourself in a fight unprepared to bunt their nose with the butt of your palm, because if the other person tucks their head and you end up hitting their forehead instead it’ll do a lot less damage to your palm than your knuckles.
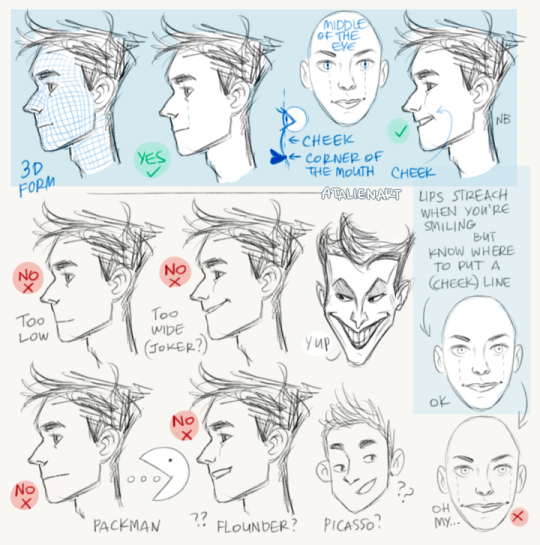
I’m not sure what specific part you’re wondering about, so here’s a run-through of my process from sketching to painting!
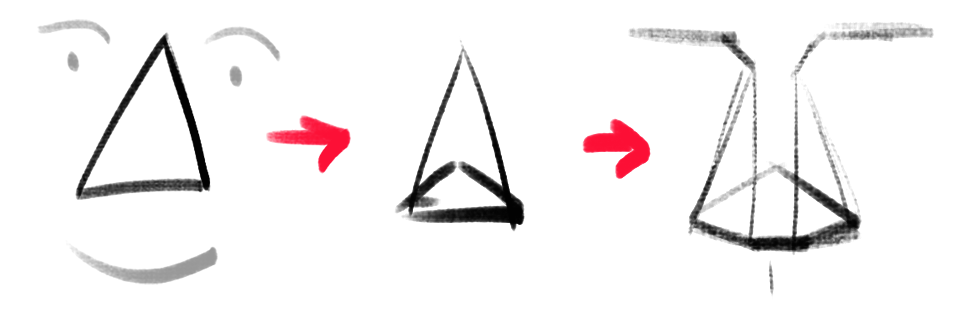
1) The first thing I do is simplify the nose into a few basic shapes to get a prism-like block, like so:
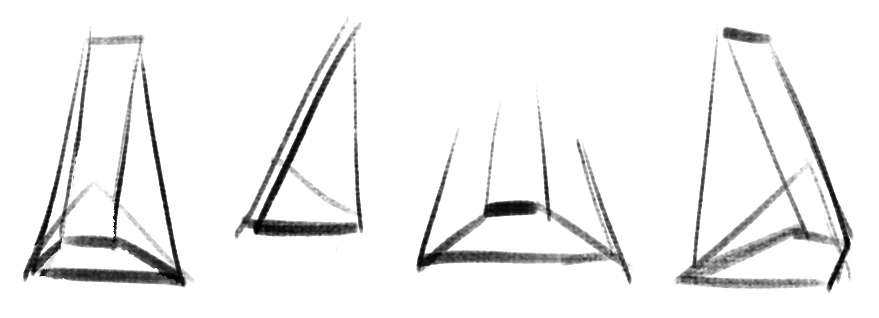
2) I can now easily draw the prism shape in three-dimensional space depending on the angle and rotation of the head.
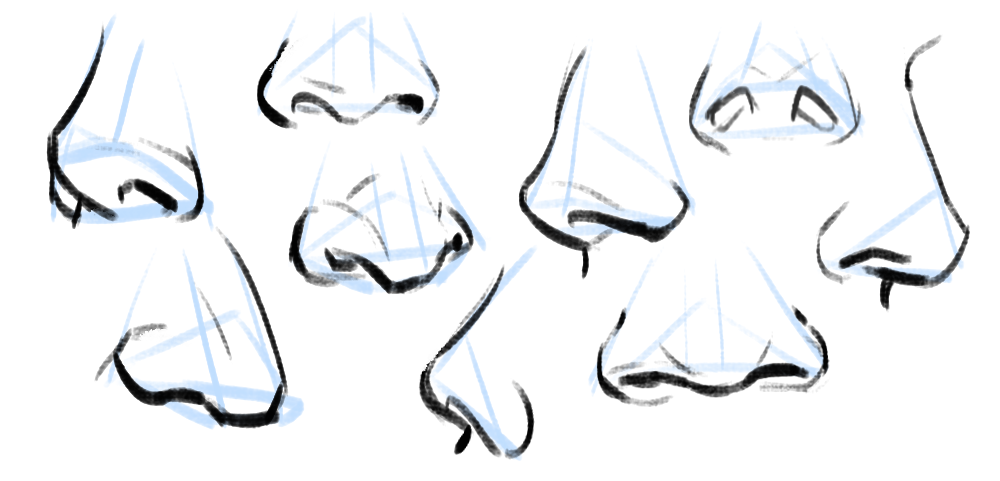
3) Using the guidelines/planes I can draw a proper nose in any angle! There aren’t many tricks or shortcuts for this step, unfortunately (other than practicing lots). I recommend using references, they’re always helpful 🙂
4) Really important to note: all noses vary greatly, especially from different ethnicities! A high-bridge “aristocratic” sort of nose or a ski-slope button nose might be accurate for some people, but definitely not everyone. Compare differences in size, width, a hooked or button nose tip, high or low nose bridge, and so on:
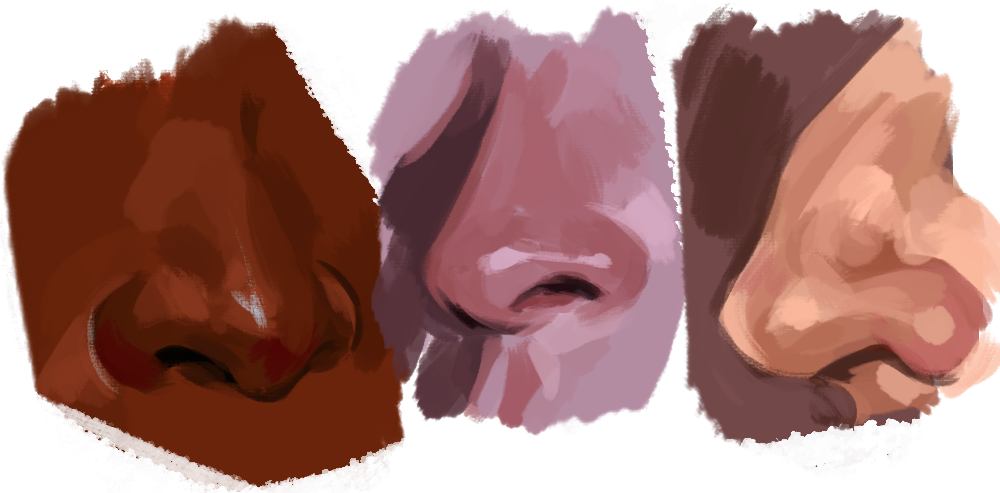
5) Then I paint! I have a skin tone tutorial here, if it helps. Take note of the lighting, skin tone, etc. Here are some things I keep in mind:
For pale skin tones, the nose sometimes has a redder colouration than the rest of the face because of increased blood flow.
The nose also usually has highlights (due to oil). These are located on the tip of the nose, the nostril groove, and where the base of the nose meets the flat area of skin around it!
Hope this helps! In the end, all stylistic choices are completely up to you. Art’s subjective, so feel free to draw any noses you want 🙂
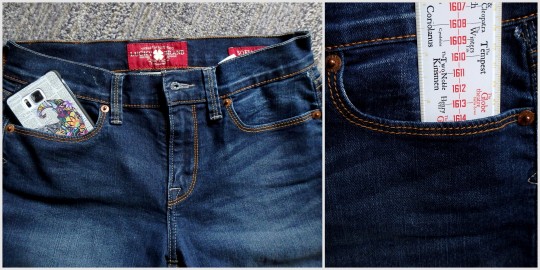
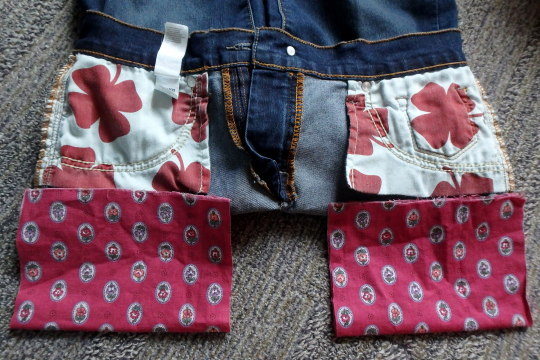
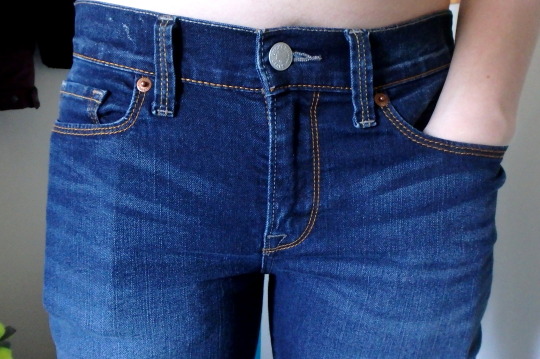
So I don’t know about you, but I’m often frustrated by the ridiculous smallness of girls’ pockets. At a bare minimum, I need to be able to shove my cellphone in there – come on, pants companies! So what I started doing was making myself pocket extenders. I’ve done this several times, for pants and shorts. It’s great.
I just got this pair of jeans, so I thought I’d show you how to do it. I kind of feel like it just hasn’t occurred to some of you that this is an option, so maybe now it will. All you need is your pants, some fabric (I just took a random piece from a scrap bin), a needle, and some thread (thread doesn’t even need to match the fabric since literally no one will see it).
See? Ridiculous. Like, half a cellphone, or only 2.5″. Useless.
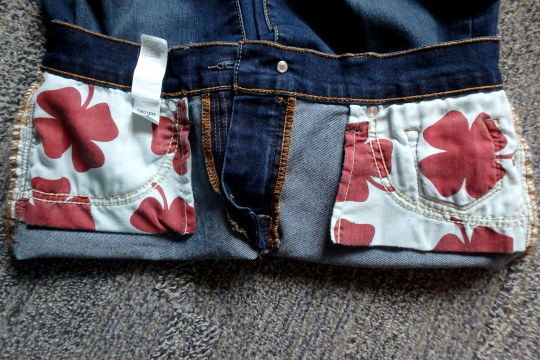
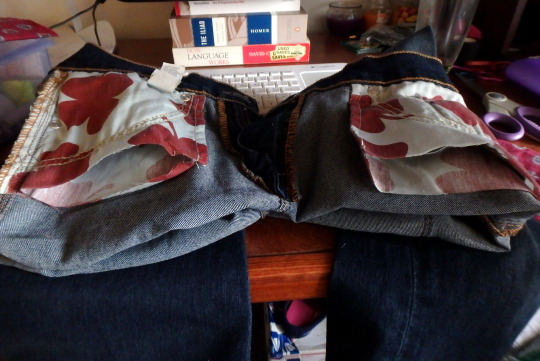
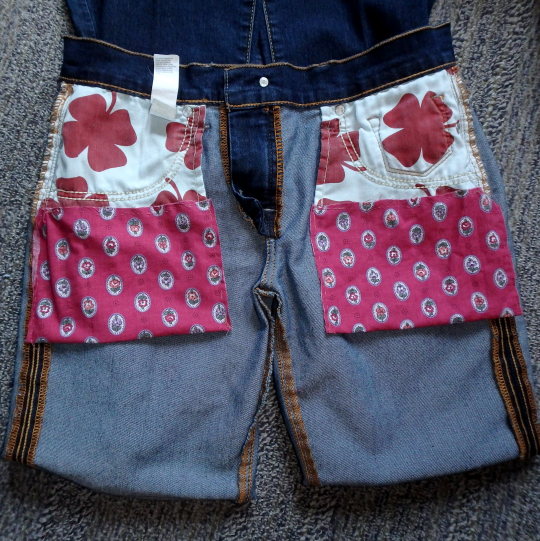
So turn those inside out to expose the pockets.
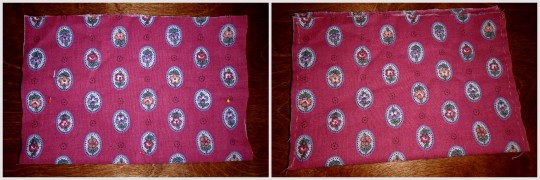
Figure out how big you want your pockets to actually be. I kinda go by whatever looks like might be right. I didn’t
really measure them. Fold the fabric in half, so you have a pocket, and
then fold it in half again so you can have two equal ones.
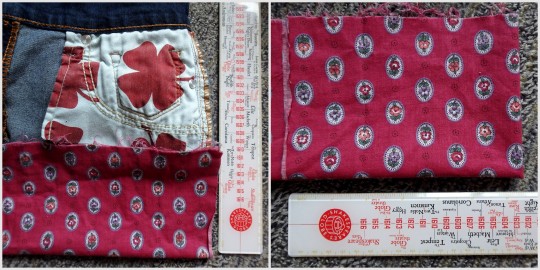
Try to get the edges to line up enough, pin it in place, then sew up the sides! Are your stitches crazy uneven and wonky looking? Doesn’t matter; nobody’s going to see it. These are in the inside of your pants. The only thing that matters is that it holds up. So I double-did the corners, since those tend to get the most stress.
Cut open the bottom of the existing pockets.
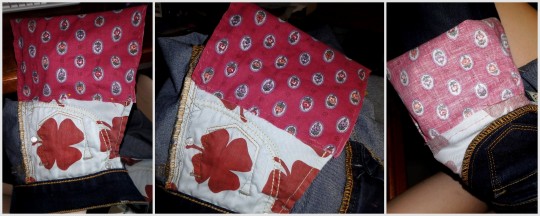
Pin it in place, then sew around, joining the new pocket to the old pocket. I did this by keeping my hand on the inside, so I wouldn’t accidentally sew through the other side. Again, I reinforced the corners, and didn’t worry about what it actually looks like. Then I turned it in side out to make sure the inside was all joined properly.
Yay all done! And the pockets are so much bigger now!
Whaaaat I can fit my entire phone and entire hand and probably something else now, are girls’ pockets even allowed to do that?! Heck yeah they are.
I’m absolutely embarrassed that I never knew this before but…
The pen stand that most Wacom products come with?
It twists off and has a bunch of nibs in it.
I’ve been buying extra nibs when they were in this stupid thing the whole time.
Reblog to save a life.
ARe YOU KIDDING
I just checked and HOLY FUCK
For anyone who has a Wacom Intuos that looks like this
The spare nibs are on the back of the removable panel where you can change the pen loop colour.
Also there’s a little hole in that compartment that looks like this
You see the little eject symbol? This guy is how you remove your worn down nibs.
Press the pen nib in on an angle like this and lift up.
and ta-da! you just removed your pen nib!
HOOOLLLLYYY COOOOW
I feel like an idiot for not knowing this.
FUCK
ok i’ve never had an intuos but im reblogging this because it’s funny as fuck why the hell is wacom so god damn extra like literally what other consumer electronic product would have a hidden removable panel that contains customizable color attachments, replacements for worn out parts, and a mysterious “eject hole” with like ZERO EXPLANATION
WHAT OTHER COMPANY THIS VAGUE AND EXCESSIVE ?? THEIR STANDARD PARTS REPLACEMENTS ARE HIDDEN WITHIN THEIR PRODUCT SO SECRETIVELY THAT MOST PEOPLE ARE LEARNING ABOUT IT FROM A TUMBLR POST AFTER OWNING THE PRODUCT FOR Y E A R S
im screaming its literally in the directions
ajfksdj oKAY SO THE “REMOVING THE NIB” TIDBIT IS DIFFERENT FOR THOSE WHO HAVE THE INTUOS PRO SMALL LIKE ME AND OP, BUT OP DIDNT MENTION THIS
If you ever wanted to know how to properly do a 2d character turn, my friend max and I made a video showing you how to use the photoshop timeline to create a rotation of your characters. this can be applied to almost any type of character design. you can watch the full video here on our youtube page.