I’m not sure what specific part you’re wondering about, so here’s a run-through of my process from sketching to painting!
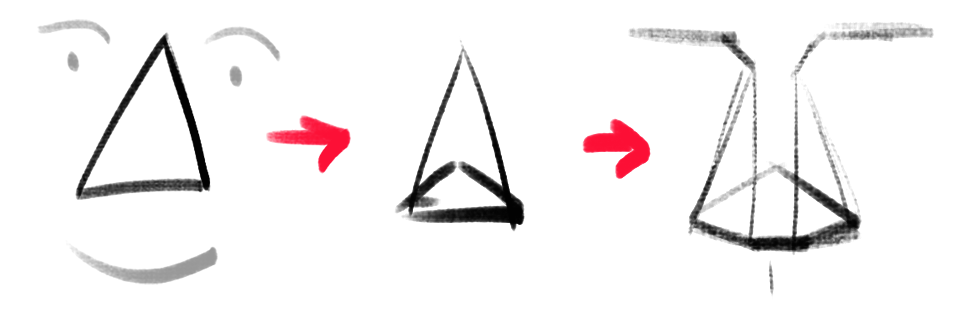
1) The first thing I do is simplify the nose into a few basic shapes to get a prism-like block, like so:
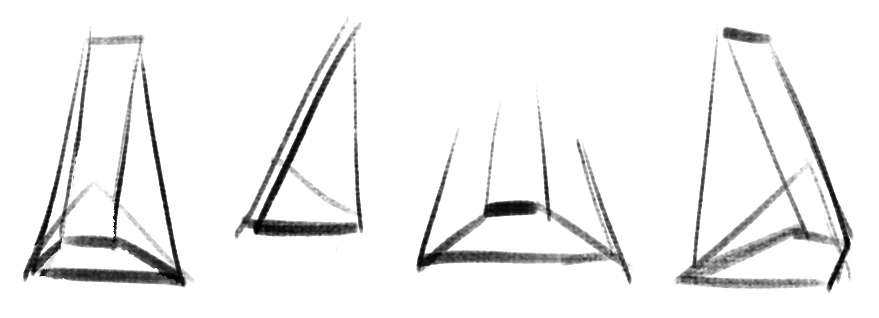
2) I can now easily draw the prism shape in three-dimensional space depending on the angle and rotation of the head.
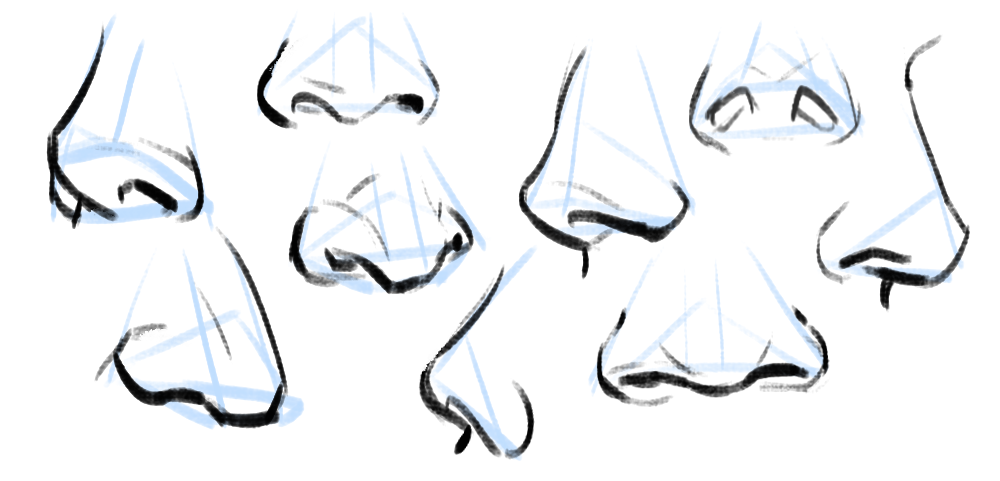
3) Using the guidelines/planes I can draw a proper nose in any angle! There aren’t many tricks or shortcuts for this step, unfortunately (other than practicing lots). I recommend using references, they’re always helpful 🙂
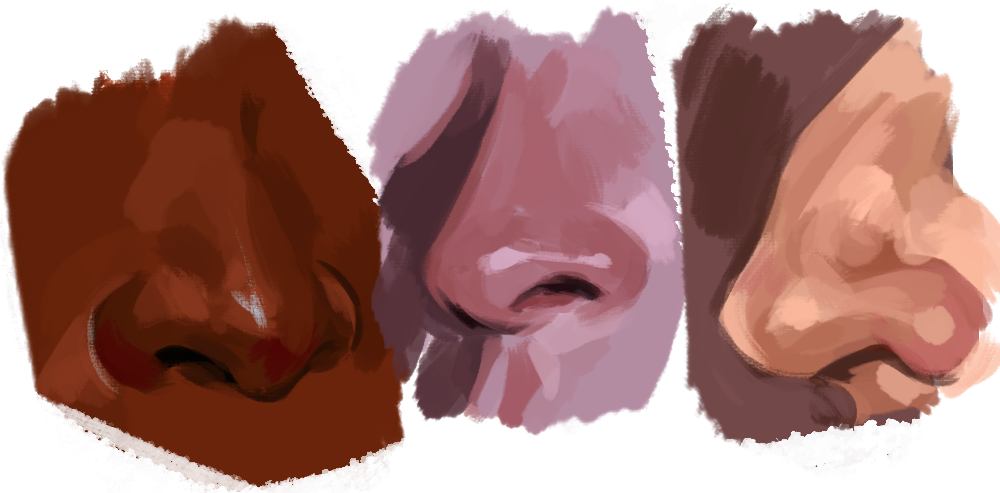
4) Really important to note: all noses vary greatly, especially from different ethnicities! A high-bridge “aristocratic” sort of nose or a ski-slope button nose might be accurate for some people, but definitely not everyone. Compare differences in size, width, a hooked or button nose tip, high or low nose bridge, and so on:
5) Then I paint! I have a skin tone tutorial here, if it helps. Take note of the lighting, skin tone, etc. Here are some things I keep in mind:
For pale skin tones, the nose sometimes has a redder colouration than the rest of the face because of increased blood flow.
The nose also usually has highlights (due to oil). These are located on the tip of the nose, the nostril groove, and where the base of the nose meets the flat area of skin around it!
Hope this helps! In the end, all stylistic choices are completely up to you. Art’s subjective, so feel free to draw any noses you want 🙂
An EXCELLENT animation joke here! Please note that all of this has been animated on 1’s(which is to say that each drawing is only being held for 1 frame), where most anime is animated on 3’s(each drawing held for 3 frames). This makes the animation look especially fluid, but is extremely time consuming to do – even classic Disney cartoons tended to animate on 2’s as much as possible!
Also worth noting is the beautiful flow of S to C curves in the long hair – this is another thin that is often heavily simplified in anime.
What’s more, the entire shot is complicating the animation – the low angle with multiple head turns, the way the hand interacts with the hair, and the extreme foreshortening of the hand as it moves towards the camera.
Lovely animation combined with a wonderful awareness of the skills and pitfalls of the industry!
(This clip is sourced from an anime called Joshiraku, and the rest of it appears to be animated in a more traditional anime style)
So I don’t know about you, but I’m often frustrated by the ridiculous smallness of girls’ pockets. At a bare minimum, I need to be able to shove my cellphone in there – come on, pants companies! So what I started doing was making myself pocket extenders. I’ve done this several times, for pants and shorts. It’s great.
I just got this pair of jeans, so I thought I’d show you how to do it. I kind of feel like it just hasn’t occurred to some of you that this is an option, so maybe now it will. All you need is your pants, some fabric (I just took a random piece from a scrap bin), a needle, and some thread (thread doesn’t even need to match the fabric since literally no one will see it).
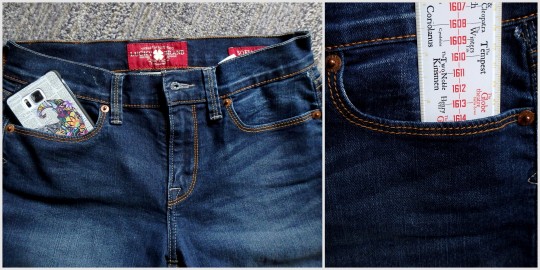
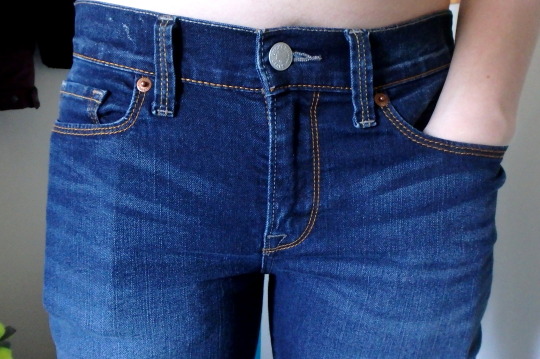
See? Ridiculous. Like, half a cellphone, or only 2.5″. Useless.
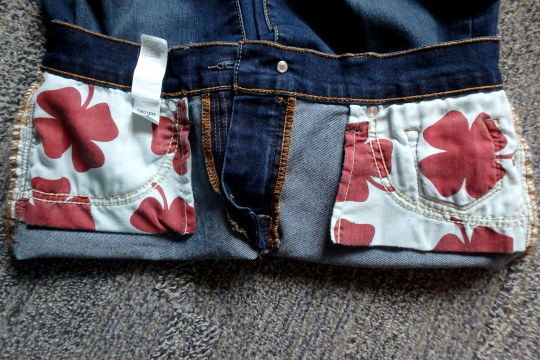
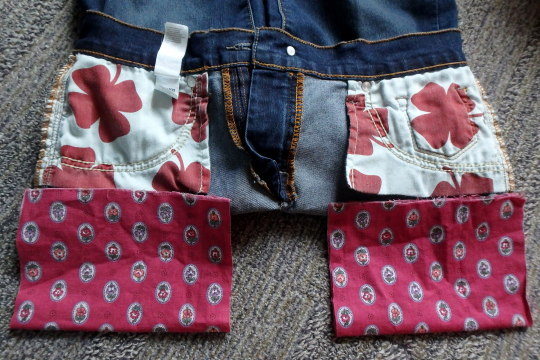
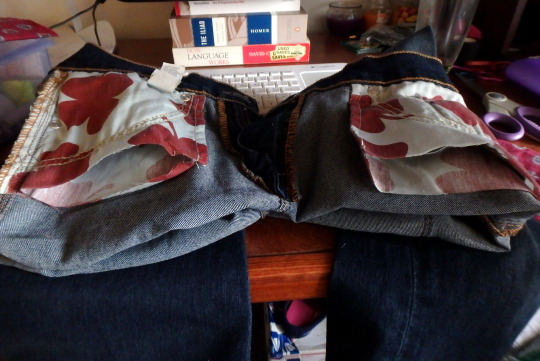
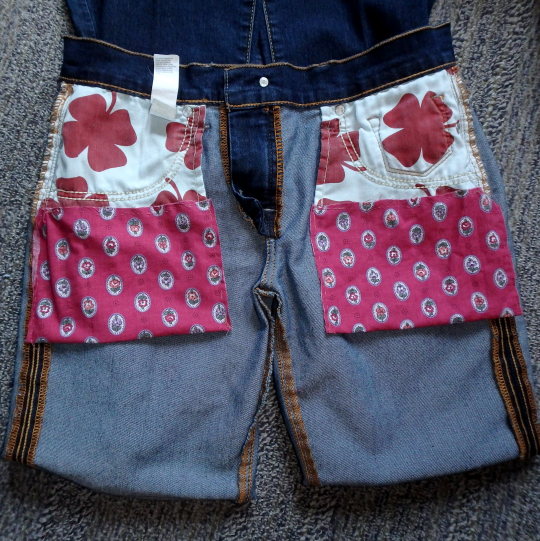
So turn those inside out to expose the pockets.
Figure out how big you want your pockets to actually be. I kinda go by whatever looks like might be right. I didn’t
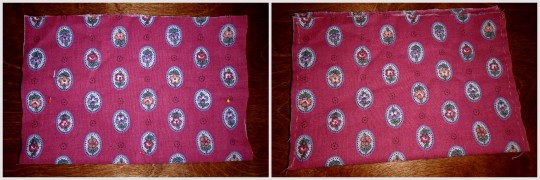
really measure them. Fold the fabric in half, so you have a pocket, and
then fold it in half again so you can have two equal ones.
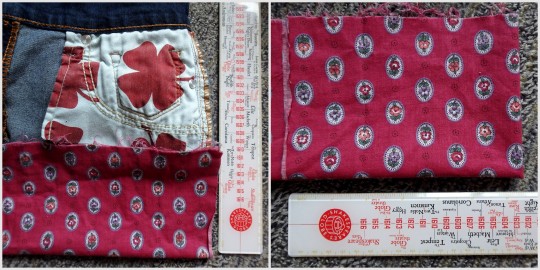
Try to get the edges to line up enough, pin it in place, then sew up the sides! Are your stitches crazy uneven and wonky looking? Doesn’t matter; nobody’s going to see it. These are in the inside of your pants. The only thing that matters is that it holds up. So I double-did the corners, since those tend to get the most stress.
Cut open the bottom of the existing pockets.
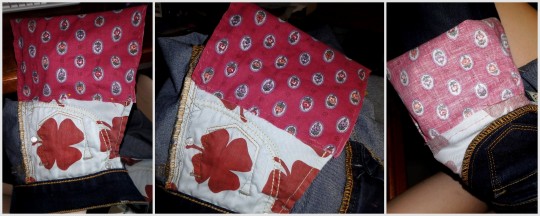
Pin it in place, then sew around, joining the new pocket to the old pocket. I did this by keeping my hand on the inside, so I wouldn’t accidentally sew through the other side. Again, I reinforced the corners, and didn’t worry about what it actually looks like. Then I turned it in side out to make sure the inside was all joined properly.
Yay all done! And the pockets are so much bigger now!
Whaaaat I can fit my entire phone and entire hand and probably something else now, are girls’ pockets even allowed to do that?! Heck yeah they are.